To install the Arctic Liquid Freezer II 420, attach the radiator to your case and secure the pump to the CPU. Connect the fans and power cables.
The Arctic Liquid Freezer II 420 is a high-performance all-in-one liquid cooler, ideal for advanced cooling needs. Its 420mm radiator and integrated VRM fan offer exceptional thermal performance. The installation process is straightforward, designed for both novice and experienced builders.
Proper installation ensures optimal cooling efficiency and system stability. The cooler is compatible with various CPU sockets, making it versatile for different builds. Ensure all connections are secure and check for compatibility with your case size. This robust cooling solution helps maintain low temperatures even during heavy workloads or overclocking sessions, enhancing overall system performance and longevity.
Pre-installation Preparations
You will need a screwdriver, thermal paste, and a cleaning cloth. A pair of scissors can be helpful for cutting zip ties. Make sure to have a small bowl to keep screws safe. It is important to have a flashlight for better visibility. Check that you have all these tools before starting.
Ensure your case supports a 420mm radiator. Check the motherboard compatibility with the Arctic Liquid Freezer II 420. Confirm the CPU socket type matches the cooler’s mounting system. Verify there is enough clearance for the cooler and fans. Look at the manual for any specific requirements. Make sure your power supply can handle the cooler’s energy needs.
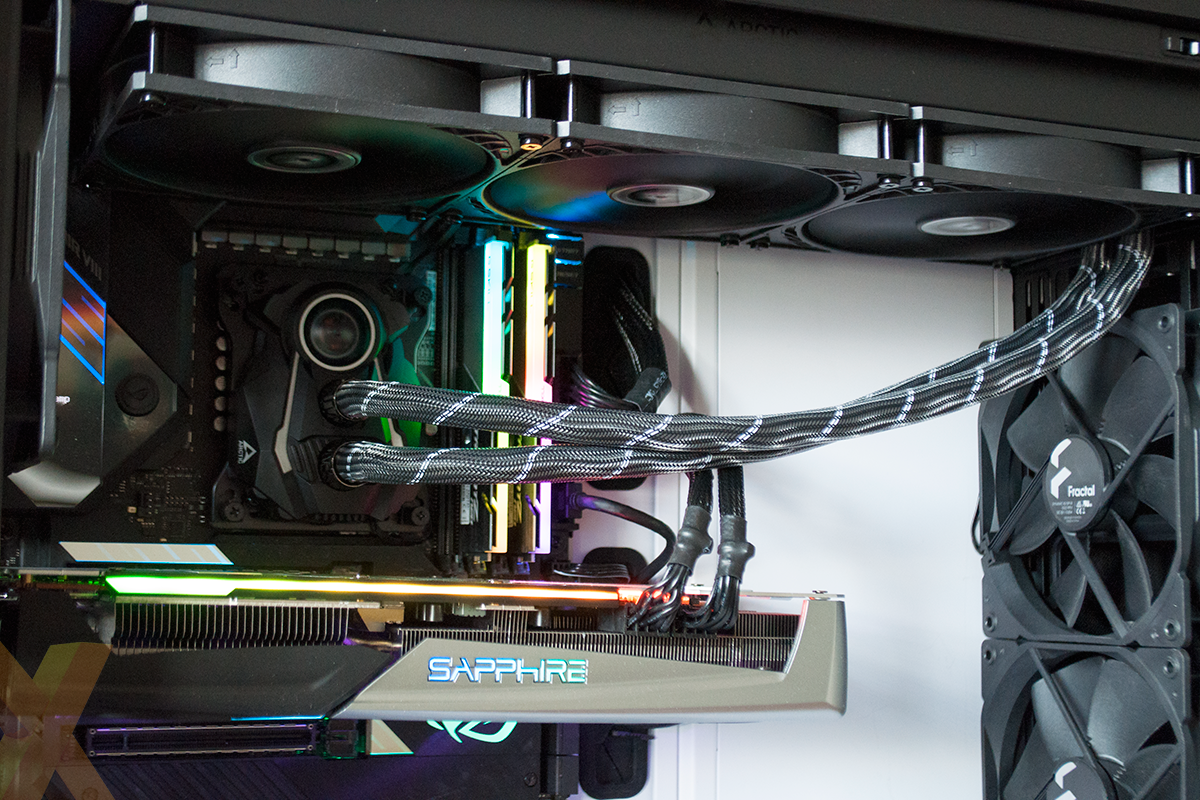
Credit: hexus.net
Unboxing And Inspection
The box contains several parts. You will find the cooler unit and three 140mm fans. There are also screws and mounting brackets. A detailed installation guide is included. Arctic also provides thermal paste for the CPU. Everything is neatly packed to avoid damage.
Check each component carefully. Ensure the cooler unit has no visible damage. Inspect the fans for any broken blades. Verify all screws and brackets are present. The installation guide should be complete. The thermal paste tube should be sealed. This ensures a smooth installation process.
Mounting The Radiator
Choose a spot with good airflow. Check the size of the radiator and case. Ensure there is enough space for the radiator. Avoid blocking other components. Think about the airflow direction. Front and top of the case are good spots. Double-check the measurements before starting.
Align the radiator with the mounting holes. Use the provided screws. Tighten the screws evenly. Do not over-tighten to avoid damage. Connect the fans to the radiator. Plug the fan cables into the motherboard. Check the connections before powering on.
Credit: www.youtube.com
Installing The Fans
Choose the best position for your fans. You can place them on the top, front, or bottom of your case. Top placement helps with heat. Front placement brings cool air inside. Bottom placement pushes warm air out. Each position has its own advantages.
Use the screws provided to attach the fans. Align the fans with the holes on the case. Insert the screws and tighten them. Make sure the fans are secure. Connect the fan cables to the motherboard. Double-check the connections.
Preparing The Cpu Block
First, clean the CPU surface. Use a lint-free cloth and some isopropyl alcohol. Make sure the surface is spotless. Next, apply a small amount of thermal paste to the CPU. A pea-sized dot is enough. Spread it evenly using a plastic card or your finger wrapped in plastic. This ensures proper heat transfer between the CPU and the block.
Align the CPU block over the CPU. Make sure it matches the mounting holes. Gently place the block onto the CPU. Apply even pressure to avoid air bubbles. Secure the block using the provided screws. Tighten them in a crisscross pattern. This ensures even pressure on all sides.
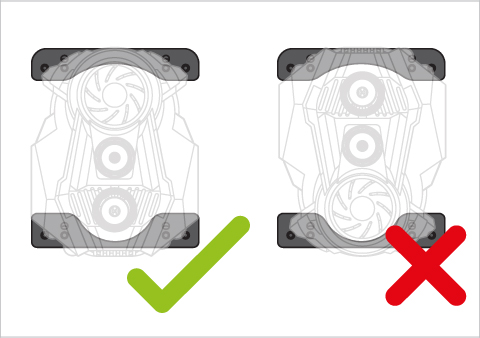
Credit: support.arctic.de
Connecting The Pump And Fans
First, locate the CPU_FAN header on your motherboard. Connect the pump’s power cable to this header. This ensures the pump receives power. Next, find the CHA_FAN headers for the fans. Attach each fan cable to these headers. Ensure connections are tight. This will optimize cooling performance. Check the motherboard manual for specific locations.
Organize cables to improve airflow. Use zip ties to secure loose cables. Route cables behind the motherboard tray. This keeps the interior neat. Avoid crossing power and data cables. It can cause interference. Use cable combs for a clean look. Ensure no cables block the fans. This maximizes cooling efficiency.
Final Checks And Testing
Check all connections before turning on your computer. Make sure the power cable is secure. Look at the fan connectors to see if they are tight. Ensure the pump is plugged in correctly. Each connection should be firm.
Press the power button on your computer. Listen for any unusual sounds. Look at the fan blades to see if they are spinning. Feel the tubes to see if they are warm. Check the temperatures in your BIOS.
Troubleshooting Common Issues
Noisy fans can be very annoying. First, check if the fans are properly secured. Loose fans can cause vibrations. Tighten any loose screws. Next, clean the fans. Dust and debris can make fans noisy. Use a can of compressed air to clean them. If the fans are still noisy, consider replacing them. Sometimes old fans need to be replaced with new ones.
High temperatures can harm your computer. Ensure the cooler is properly installed. The thermal paste should be evenly spread. Check the pump to see if it is working. A broken pump can cause high temperatures. Monitor the coolant levels. Low coolant can lead to overheating. Make sure good airflow in the case. Poor airflow can cause temperature issues.
Maintenance Tips
Ensure efficient cooling performance by securely mounting the Arctic Liquid Freezer II 420. Tighten screws evenly to avoid any leakage. Double-check all connections for a seamless installation.
Cleaning The Radiator And Fans
Keep the radiator and fans clean for optimal performance. Use a soft brush or compressed air to remove dust. Clean the radiator fins gently to avoid damage. Check the fans for dust buildup. Clean them carefully to ensure smooth operation. Regular cleaning helps maintain cooling efficiency. Clean the radiator and fans every few months.
Regular Performance Checks
Monitor the cooling performance regularly. Check the temperature of your CPU. Ensure the cooler is working properly. Listen for unusual noises from the pump or fans. Ensure all connections are secure. Regular checks help identify issues early. Keep your system running smoothly with these checks.
Frequently Asked Questions
Does The Arctic Liquid Freezer Ii 420 Come With Thermal Paste?
Yes, the Arctic Liquid Freezer II 420 comes with pre-applied MX-4 thermal paste. You don’t need to buy it separately.
What Size Screws Are In The Arctic Liquid Freezer Ii?
The Arctic Liquid Freezer II uses M3x5 screws for mounting the fans and radiator. It also includes M4x10 screws for the brackets.
How Long Does Arctic Liquid Freezer 2 Last?
The Arctic Liquid Freezer 2 typically lasts 5-6 years with proper maintenance. Its durability depends on usage and care.
How Thick Is The Arctic Cooling Liquid Freezer Ii Radiator?
The Arctic Cooling Liquid Freezer II radiator is 38mm thick. It offers efficient cooling for high-performance systems.
Conclusion
Installing the Arctic Liquid Freezer II 420 can elevate your PC cooling system. Follow the steps carefully for optimal performance. This cooler is efficient, quiet, and easy to set up. Enjoy enhanced cooling and prolonged hardware lifespan. For more tips, stay tuned to our blog.
Happy building!