To make dividers for a chest freezer, measure the interior and cut materials like cardboard or plastic to fit. Secure the dividers with tape or adhesive.
Organizing a chest freezer can be challenging without proper dividers. Proper dividers help maximize space and keep different food items separated. This organization reduces the time spent searching for items and minimizes energy loss. Materials like cardboard, plastic, or lightweight wood can be used to create custom dividers that fit perfectly.
Cutting these materials to the right size and securing them properly ensures they stay in place. Dividers not only enhance the freezer’s efficiency but also extend its lifespan by maintaining an even temperature. Investing time in making dividers can lead to a more organized and efficient kitchen.
Planning
First, get a measuring tape. Measure the length, width, and height of your chest freezer. Write down these numbers. You will need them later. Make sure to measure accurately. This will help your dividers fit well. Measure twice to avoid mistakes. Check if there are any bumps or shelves inside the freezer. Note these too. They may affect the divider size.
Start by sketching your design on paper. Plan how many sections you want in the freezer. Each section will need a divider. Think about the items you will store. Larger items need bigger sections. Smaller items can be in smaller sections. Use your freezer measurements to size your dividers. Make sure they fit. You can use cardboard or plastic for your dividers. Choose a material that will last. Cut the dividers carefully to match your design. Test fit them before finalizing.
Preparing Materials
Gather plywood, measuring tape, and a saw to start your chest freezer divider project. Ensure all materials are durable and moisture-resistant.
Cutting The Materials
Get your plywood and measure it. Use a saw to cut the wood to size. Ensure the cuts are straight. Use a ruler for accuracy. Wear safety goggles to protect your eyes. Always cut on a stable surface.
Sanding And Painting
Use sandpaper to smooth the edges. This helps prevent splinters. Wipe off the dust with a cloth. Choose a paint that is freezer-safe. Apply a coat of primer first. Let it dry completely. Then, paint the wood with your chosen color. Allow the paint to dry fully before use.
Assembly
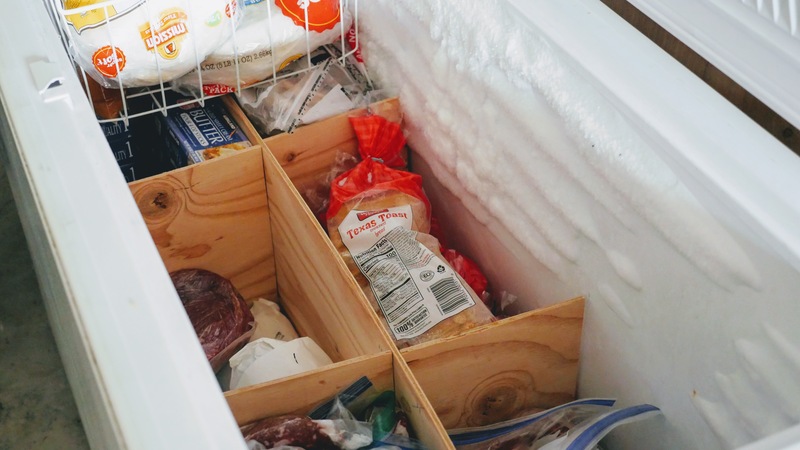
Start by measuring the inside of your chest freezer. Cut pieces of wood or plastic to fit these measurements. Sand the edges to make them smooth. Use a strong adhesive to attach the pieces together. Ensure the dividers are stable and sturdy.
Place the dividers inside the chest freezer. Make sure they fit snugly. You may need to adjust the placement. Use adhesive strips to secure the dividers in place. Allow the adhesive to dry fully before using the freezer. This will ensure the dividers stay in place.
Credit: mealplanaddict.com
Installation
Create custom dividers for your chest freezer by measuring the interior dimensions and cutting materials like plastic or cardboard. Secure the dividers in place to organize and maximize storage space efficiently.
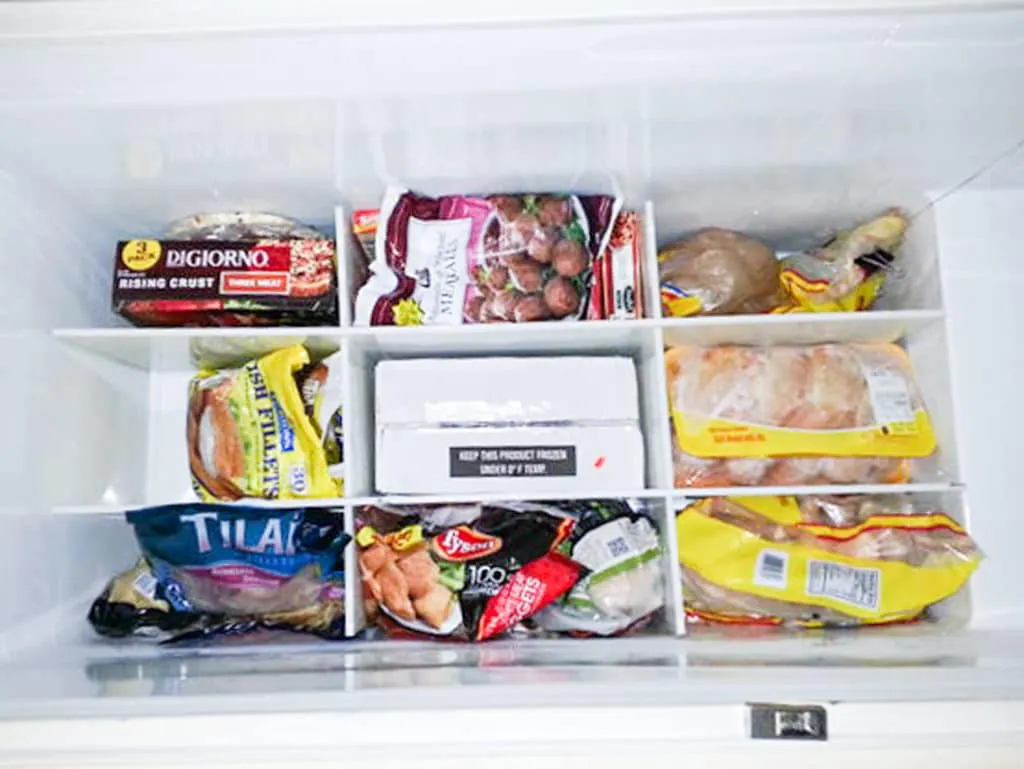
Placing The Dividers In The Freezer
Place the dividers inside the freezer. Make sure they fit snugly. The dividers should not move easily. This helps to keep the food organized.
Adjusting For Optimal Storage
Adjust the dividers to create different sections. Each section can hold different types of food. This will make it easy to find things. Try to keep similar items together. This saves time when looking for something.
Tips And Tricks
Use cardboard or plastic sheets to create dividers. Cut them to fit the freezer. Label each section for easy access. This keeps similar items together. Vertical dividers save more space. Store items by category. This helps find things faster.
Check the dividers regularly. Make sure they stay in place. Clean them as needed. Replace damaged dividers promptly. Keep the freezer organized. This helps the freezer run efficiently. Proper maintenance extends the life of the freezer.
Credit: www.thecoupleproject.com
Customization Options
Labels help in organizing the freezer. Use waterproof markers to create labels. Stick labels on the dividers. This makes it easy to find items. Labels can be color-coded. This helps in quick identification. You can also use pre-made labels. They are available in stores.
Adjustable dividers offer flexibility. They can be moved to fit different items. Use plastic or metal dividers. These materials are durable. Velcro strips can hold the dividers in place. This setup allows for quick changes. Adjust dividers to fit large or small items. This helps in maximizing space.

Credit: thegigsdigs.blogspot.com
Frequently Asked Questions
What Can I Use For Dividers In My Chest Freezer?
Use plastic bins, cardboard boxes, wire baskets, or reusable grocery bags as dividers in your chest freezer.
How Do You Partition A Chest Freezer?
Use storage bins or baskets to create sections. Label each bin for organization. Use dividers made of cardboard or plastic. Arrange items by type for easy access.
How Do You Separate Food In A Chest Freezer?
Separate food in a chest freezer using bins or baskets. Label each container for easy identification. Group similar items together. Rotate stock to use older items first. Keep an inventory list.
How Do I Maximize My Chest Freezer Space?
Organize items in bins and label them. Freeze food flat in bags. Use vertical dividers. Rotate older items forward.
Conclusion
Creating dividers for your chest freezer is simple and cost-effective. Follow these steps to maximize your freezer space efficiently. Organize your food items better and reduce clutter. Enjoy easier access to your frozen goods and maintain a tidy freezer. Start this DIY project today and see the difference it makes.